
Many Gaming laptops run hot and often it’s a combination of factors but all will have one element that is mainly going to impact the CPU heat output which is how fast the Processor Cores are running. Some laptops with Intel HX series or AMD HX series CPUs will usually have some software tools (Intel XTU, AMD Ryzen Master) to assist in controlling the CPU Boost Ratios and even voltage control but there are many with locked CPUs that provide the user with no control over anything meaning it’s always trying to run full boost.
Boost mode is ok but there are times when the CPU is trying to run itself to the maximum boost on all cores at any given opportunity which is not really helping especially when the CPU is constantly hitting 95 DegC or higher. Under these circumstances performance will be hindered as the CPU is bouncing off the thermal limiter which causes latency issues, slower fps and stuttering during game play and all because the boost algorithm is attempting to function right to the thermal limit as defined by the CPU manufacturer. It’s a terrible way to run a CPU and the fault is partially due to the laptop cooling capabilities as it’s always going to be limited by design, size and costs.
The problem when it comes to gaming is that these CPUs might actually push themselves into running to hot for their own good. So if you have a CPU that is locked and no other means to control how high the CPU Boosts there is a method within Windows that will work. This is a very easy adjustment to the Windows Registry and once completed you just head over to the power plan settings and choose the maximum Boost frequency you want your CPU to run up to.
The Registry Setting To Adjust
This will depend on your CPU and the type of cores that it contains, For CPU’s with all cores being identical, so no performance cores or efficient cores this will be one entry.
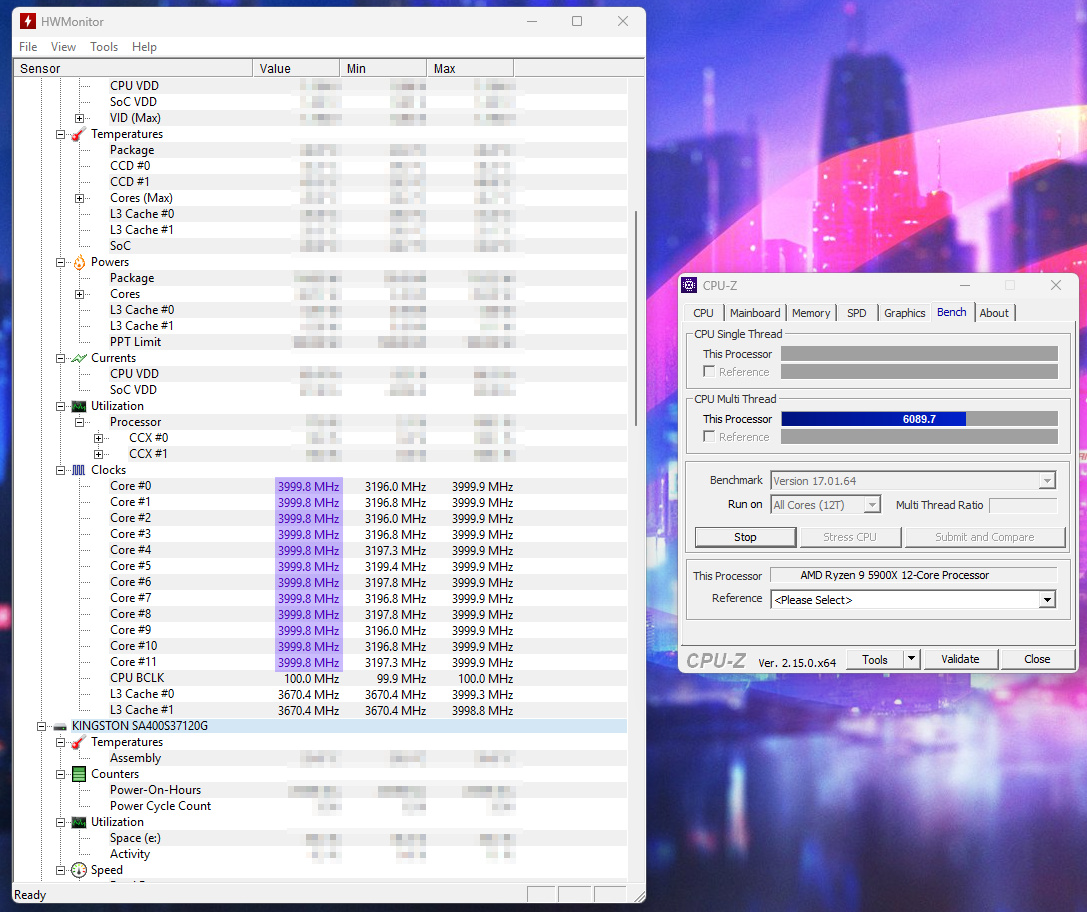
Example with an AMD Ryzen 9 5900X Processor
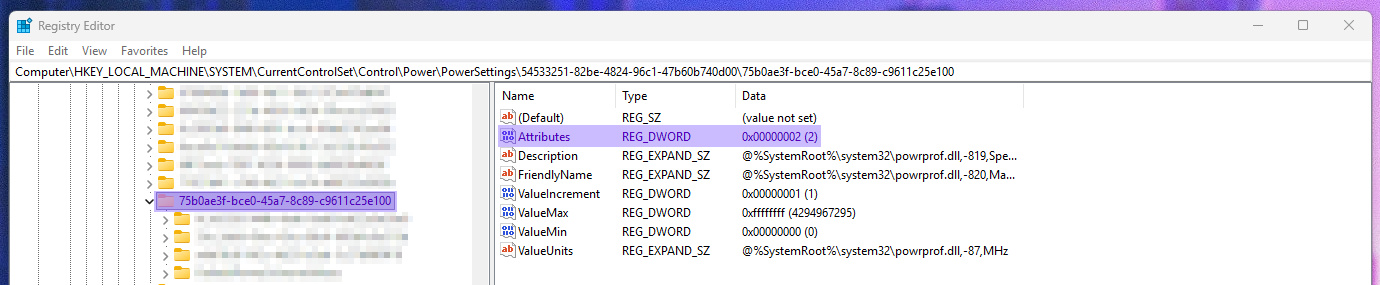
Open the Windows Registry and go to this entry location
Computer\HKEY_LOCAL_MACHINE\SYSTEM\CurrentControlSet\Control\Power\PowerSettings\54533251-82be-4824-96c1-47b60b740d00\75b0ae3f-bce0-45a7-8c89-c9611c25e100
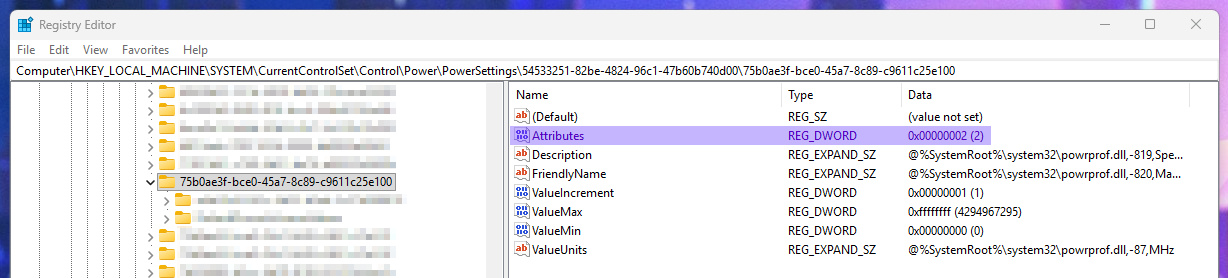
Then change the Attribute option to 2
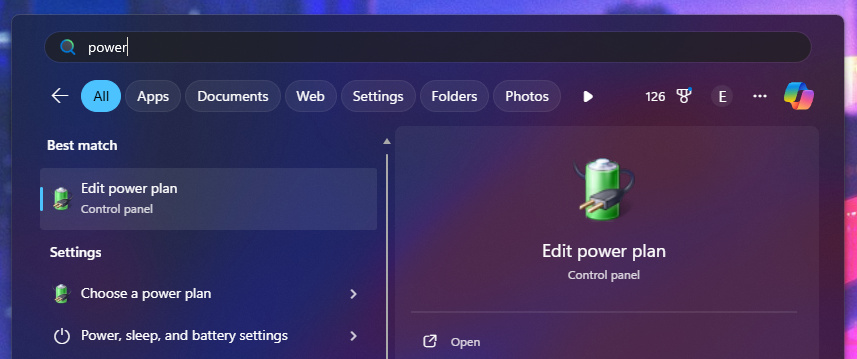
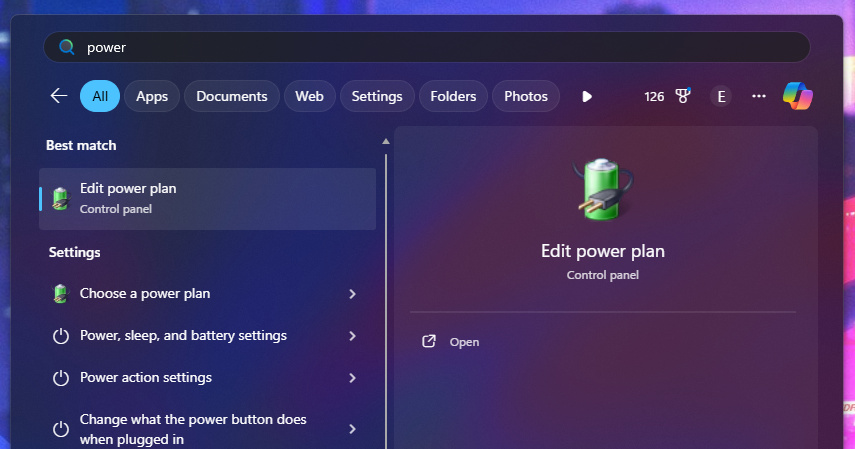
Then go to your power plan settings and click on the change advanced power settings option.
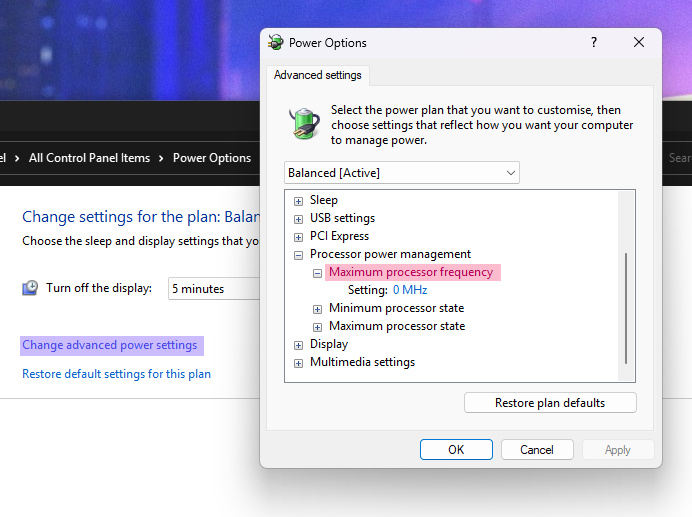
You will see a new section “Maximum processor frequency” here you need to type a number to set the boost limit. So if you want to limit the Boost frequency to 4GHz you need to type 4000.
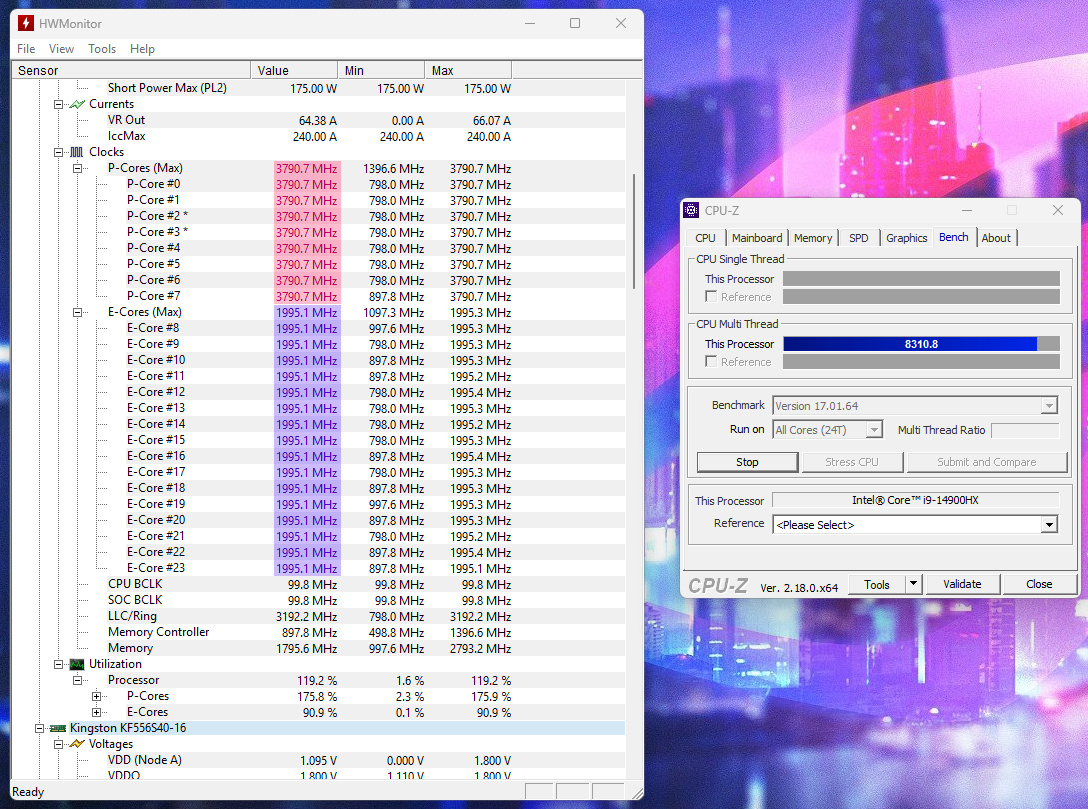
And now if you check with Hardware Monitor and use something to place a load on the CPU like CPUz benchmark, you will see the CPU boost will stop at 4GHz.
Processors with Performance Cores and Efficient Cores
If you only do the above you will find only the E-Cores will change whilst the P-Cores stay at the default boost setting. For this to work you need to make changes to another Registry entry which will be nearly identical to the above.
Example with an Intel Core i9-14900HX Processor
Open the Registry and go to the following location
Computer\HKEY_LOCAL_MACHINE\SYSTEM\CurrentControlSet\Control\Power\PowerSettings\54533251-82be-4824-96c1-47b60b740d00\75b0ae3f-bce0-45a7-8c89-c9611c25e100
Change the “Attributes” option to “2“
Next go to a very similar location, should be directly under the above, difference being this will end with 101
Computer\HKEY_LOCAL_MACHINE\SYSTEM\CurrentControlSet\Control\Power\PowerSettings\54533251-82be-4824-96c1-47b60b740d00\75b0ae3f-bce0-45a7-8c89-c9611c25e101
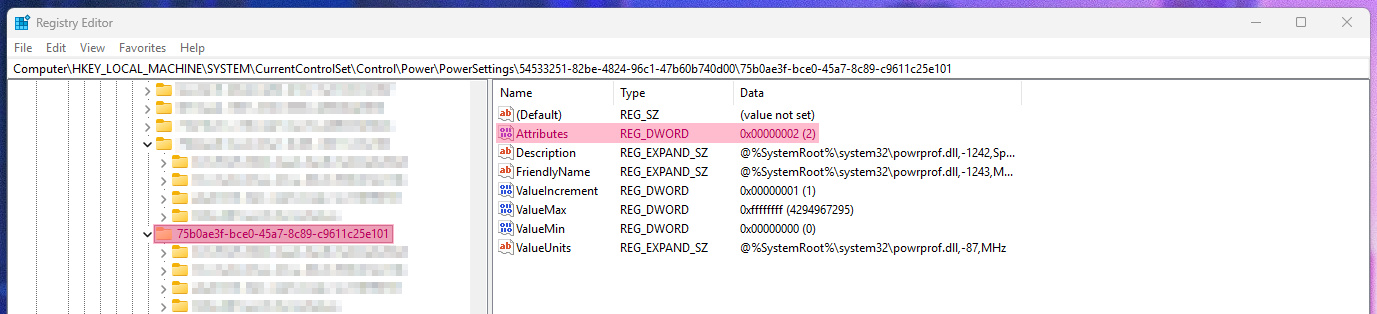
Do the same as previously, change the “Attributes” option to “2“
Go to the power plan settings and edit the profile you use which will now show 2 new options.
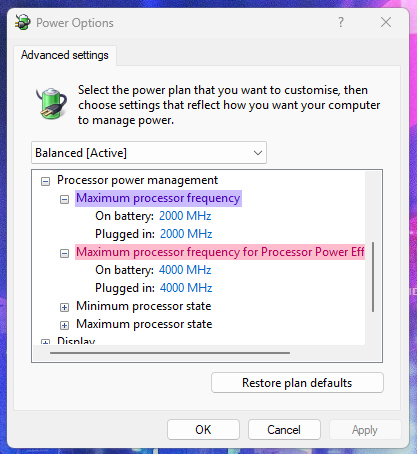
“Maximum processor frequency” This will change the E-Core Boost frequencies
“Maximum processor frequency for Processor Power Efficiency Class 1” This will change the P-Core Boost frequencies
Try some values and check with hardware monitor / CPUz, also note there will be some slight differences in frequency calculations so there can be an offset when checking. Eg here I have 4000MHz set but the actual measurement in Hardware monitor shows 3790.7MHz for the P-Cores.
If all is done correctly and functioning you now have the ability to alter the processor boost frequencies without any additional software. When using different power plan profiles, like Silent, Performance, Balanced, Turbo… you will need to change the new options in each profile as the settings only apply to the currently active profile. (Above tested using Windows 11 25H2 and Windows 11 24H2)
Notes
The above can help with performance and temperatures on many laptops including desktop PCs that have limited overclocking / BIOS options but if your computer is not functioning correctly, as in overheating or there is a problem with the cooling system (heatsink, thermal paste, fans…), this is not a workaround. The aim here is to assist in preventing CPU boost technologies pushing the frequency as high as possible so that the CPU never hits the thermal limit of 95 DegC for smoother gaming.
However this is also beneficial to non gaming tasks as often Windows operations like watching videos, browsing online will see the CPU boost single core processes too, sometimes even for brief periods of activity like opening a folder. This can create a temperature spike including causing the cooling fans to spin up in order to cool the CPU during this spike so if you were to put a limit on the boost frequencies you can also achieve quieter running / less fan noise and heat output for general usage, including battery savings.
To make a point on this, a laptop with the i9-14900HX during Windows usage will often boost 1 or 2 Performance cores all the way to 5.7GHz for extremely simple tasks. It’s not even worth the gains and only causes the CPU to ramp up the voltage, power consumption and heat output. So play around with the settings, tweak your laptop if needed and see how it performs as most will do extremely well with boost reductions.